Use your own domain name
Requires a bit of expertise, or using the domain registrar’s Helpdesk. Recommended though.
Some people would rather have their Micro.Blog at their own domain name. It’s reasonably simple to do though there are a few steps.
This is only possible if you pay for Micro.Blog hosting.
- Buy your domain name from a domain name registrar. I personally am happy with Hover and Freeparking NZ, but many people will give you recommendations if you just ask. Micro.Blog suggests DNSimple.
- Log in to your domain registrar and find the place where you can edit the DNS records for your chosen domain name. DNS stands for Domain Name Server.
- In a separate tab or browser, visit Custom domains on the Micro.Blog Help site for detailed instructions on what to do next. If you aren’t sure what to do or are having other problems contact your domain registrar’s helpdesk for support. You can point them to the above Custom domains instructions for their information.
- After making the changes at your domain registrar it may take a day or two for things to update, so wait for a bit.
- Go back to your blog to the Design section and scroll down. Fill in the Domain name: section and click the Update Microblog Settings button.
- Now test your domain name in a browser. If you have problems wait a few minutes and try again. After that, contact Micro.Blog Help if things don’t seem to be working.
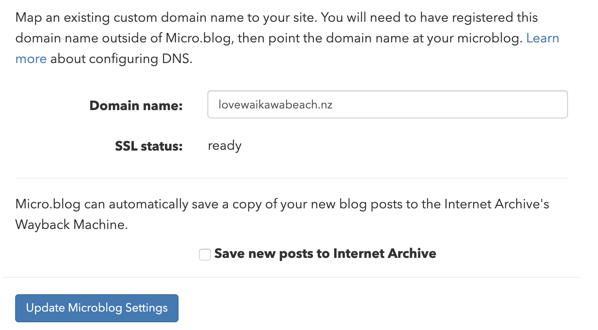
Micro.Blog domain name section.