Use Alt Text (image Description) because it's the right thing to do
Everyone should do this.
When you add an image to a blog post — a photo, for example — there's something very simple you can do to make the web a better place: you can add Alt Text to your image. From here on I'll talk about photos, as they're the most likely images most people will add.
Alt text replaces the photo
Not everyone can see photos you upload. One key group of people who won't see your photos is those who are blind. Others could be those folks on very slow or expensive Internet connections, or when there's some kind of mistake and the photo just doesn't show up.
It's only polite to tell people what the photo represents if they can't see it for themselves.
You do this by adding Alt Text, which is really easy.
Alt text is sometimes called Description
Sometimes folks refer to Alt Text as a Description, maybe because more bloggers are likely to understand that term.
The key thing to remember is that alt or alternate
text replaces the photo, it doesn't just describe it.
Here's the difference: imagine you've made a website about elephants and you have cute little elephant buttons to go to the top of the page, or the next section. 🐘 You'd describe
the elephant as being big, grey, with a trunk and so on. But the point of these particular elephants is to go to the top of the page or the next section, so the alt text would be: Top of page
or Next section
. The alt text replaces the picture. The distinction's a bit blurrier with photos on a blog, but I owe it to you to clarify that point in this tutorial.
How to add Alt Text in the iOS app
- Add a photo to your Micro.Blog post in the usual way. After the photo's attached tap once on it. Choose Add Description from the choices that appear. Another window appears titled Accessibility Description.
- Enter your
Alt Textand finish by tapping the Add button. TheAlt Textis sent along with the photo. Micro.Blog then adds the correct coding for the photo and theAlt Textto your blog post.
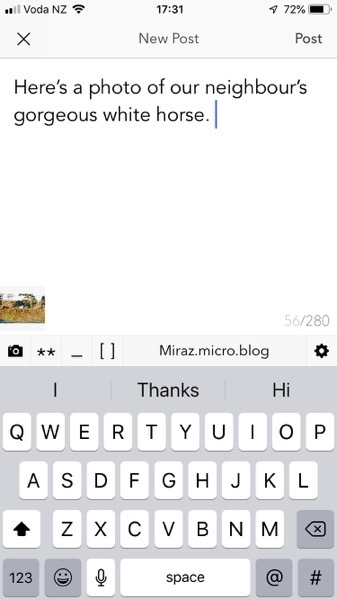
Add a photo in the iOS Micro.Blog app.
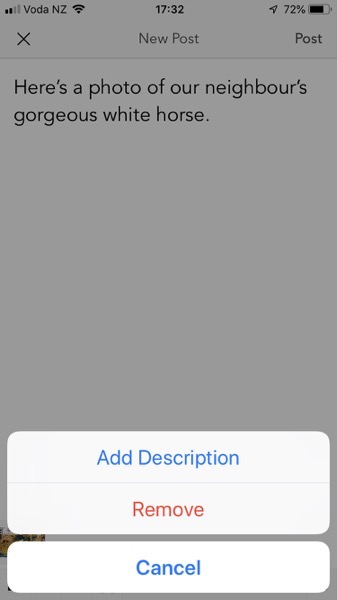
Add Description in the iOS Micro.Blog app.
Here's part of the coding Micro.Blog created from my actual blog post. I've broken it up to fit well on this page:
<p><img
src="https://miraz.me/uploads/2019/31b6cf987a.jpg"
alt="White horse standing in the sun near a tree
in brown coloured paddocks."></p>
The Alt Text I supplied has been added to the coding for the image.
Now if the photo somehow goes missing the Alt Text will show up instead.

Alt Text is visible because the image is missing.
How to add Alt Text in the web interface
- While writing a new Post in the web interface add a photo using the camera icon button. The file name of the photo appears below the composing area.
- Post your blog entry. The post is published and the blog entry disappears from view.
- Click the Posts link at the top of the page. A page showing your recent blog entries appears.
- Scroll down until you see the Edit button for your post.
- Click the Edit button. Your post is opened up and able to be edited.
- Enter appropriate
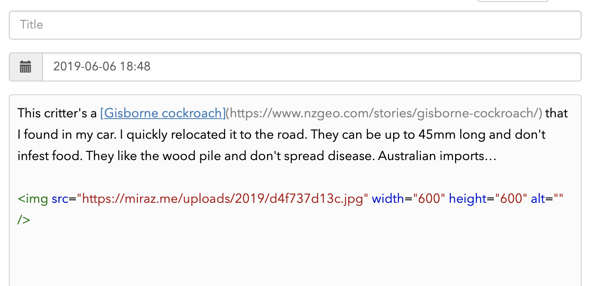
Alt Textfollowing the example above. See also the screenshots below. - Click the Update Post button to update your blog post to include the people-friendly alternate text.
This rather long-winded procedure is how it works as at June 2019. With any luck half a dozen steps will be removed. It's good Internet citizenship to include Alt Text.
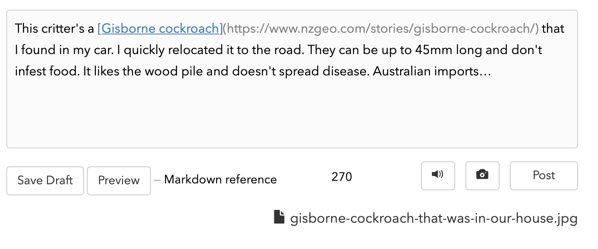
Using the web, I've added a photo to my blog entry. Then I Post the entry.

Use the Posts link at the top of the page to see a list of your latest posts.
Edit the post and add Alt Text — it's missing in this screenshot.
The edited post now includes Alt Text. Watch the syntax colouring which will alert you to coding mistakes.
Alt Text is not a caption
Sometimes people say something like: I added a Description but it's not showing up
. Alt Text (Description) doesn't show up if the picture does.
If you hand-code a blog page with HTML or perhaps Markdown then you can arrange the text and photos as you wish, including putting text captions below photos. If you use the iOS app or add your blog entry via the web interface then photos are simply put at the end.
These tutorials have been hand-coded in HTML with pictures placed where I want them.