What you need to know about CSS to customise your Micro.Blog blog
You can do this.
When you choose a Theme it will have its own stylesheet (perhaps several) which determine how your blog will look and feel. As briefly explained in an earlier tutorial there are rules that determine how various stylesheets interact. Usually though, anything you add to your own Custom Stylesheet should win
.
Add your own styles
To add your own styles:
- Go to the Design section for your blog.
- In the Custom theme: section click on the Edit CSS button. A new page opens up with a box for entering CSS rules.
- Enter the CSS you want for your blog.
- Save your changes with the Update CSS button.
- Visit your blog and Refresh to see the changes. Note: it can sometimes take a minute or two for changes to take effect.
How to find out what to change
That's all very nice in theory but most of the time you need to figure out exactly what it is you want to style. You'll see something on your blog that just doesn't look right to you, but how do you know which element you need to fix
?
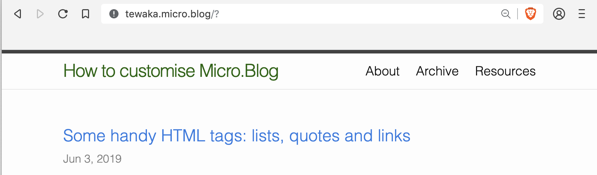
Here's the top part of this tutorials blog. Noe, at the time of writing this blog was using the Default theme. Other themes may do something different.
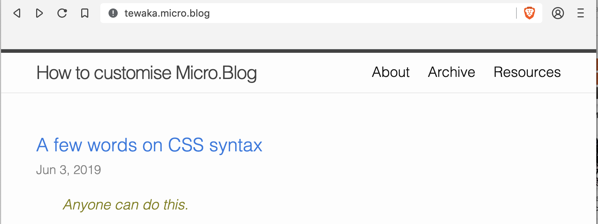
Before — top of page on tutorials blog.
Here are things I might potentially want to change:
- The colour of the name:
How to customise Micro.Blog
. CSS will do that. - The colour of the links to pages:
About, Archive, Resources
. CSS will do that. - The colour of the tutorial heading:
A few words on CSS syntax
. CSS will do that. - The format of the date:
Jun 3, 2019
. I prefer a format like03 June 2019
. CSS can't change the nature of something like that, but I could make it italics, or bold, or a different colour. CSS is good for that kind of thing. To change the date format needs different skills that will come up later in these tutorials. - The colour of the note:
Anyone can do this
. CSS will do that.
Remember, CSS allows you to change things like fonts, colours, borders, font sizes. The date is added by Micro.Blog itself and the format is part of the underlying mechanics. It's actually relatively easy to change its format, but for that we need to go into the Theme files. We can't do it just with CSS, although we could force the month name to be in uppercase (Capitals), lowercase or as it is now with the first letter capitalised.
Let's change the formatting of the blog name
One step at a time … Let's start by changing the formatting of How to customise Micro.Blog
. How can we possibly know what HTML element to write a rule for in the custom stylesheet?
We could guess that it's an h1, but maybe it's not. That's where the Web Inspector comes in.
The Web Inspector was briefly mentioned in Let's investigate a web page. It's incredibly useful for working out what styles are applied to any particular bit of a blog page and for experimenting with how the style could be changed. Use it. The more you use it the easier things will become. See screenshots below the list of steps.
- Control click near the element you want to inspect and choose
Inspect(or similar, depending which browser you're using). The Inspector pane or window opens up and may even highlight the element you want to inspect. - In my screenshot below the Inspector has highlighted the appropriate line of the HTML coding, but it's folded up the code and I must click the disclosure triangle at the left end of that line to see more. I do that and then can click on the actual line I need. It turns out that title isn't an
h1after all. - After clicking on the element you need by reading through the HTML code, look at the part of the Inspector that shows the CSS coding. I can see that on my blog it reads
.site-title, .site-title:visited { color: #424242; }. Also, a little further down, are some rules for.site-titlethat cover the font and line-height and so on. See the screenshot below where I've clicked on the colour square to choose a different color. Remember, you can change the CSS here to experiment, but it only actually affects the page in your own browser on your own screen. - Now you know that
.site-titleis the element to target when you write your CSS rule for your custom stylesheet. After messing around in the Inspector I've decided that for this tutorial anyway I want to change the colour to green and make the font bigger. I write this rule:.site-title { color:#1f6504; font-size:28px; }. Now I need to put that in the Custom Stylesheet on the blog itself to make it real for every visitor. Follow the steps above in theAdd your own stylessection. - Save the changes and Refresh your page. It can take a few minutes for the changes to take effect. With any luck, that worked and you can congratulate yourself and move on to the next thing.
- Uh oh. On my first attempt it didn't work. The font was bigger but the colour didn't change. Unfortunately, that's life with CSS. If that happens, you can:
- troubleshoot and try again
- abandon the idea
- turn to other Micro.Bloggers for help.
After some thought I realised why my custom style didn't work. Unfortunately the screenshot below obscures the full rule for the site title, although my text above reflects it accurately. In short I'll need to explain this in full elsewhere in these tutorials, but the Theme's stylesheet set both links and visited links to a dark colour. My custom rule didn't apply to visited links which is what this one was at this time on my website. I've been using, writing and even teaching about CSS for nearly a couple of decades. There's plenty to trip anyone up in CSS.
In step 4 above I should have used this rule: .site-title, .site-title:visited { color:#1f6504; font-size:28px; }.
Screenshots
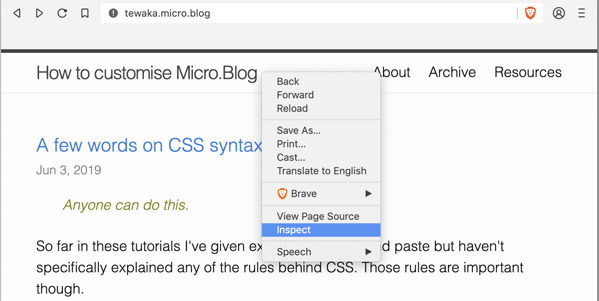
Inspect a web page.
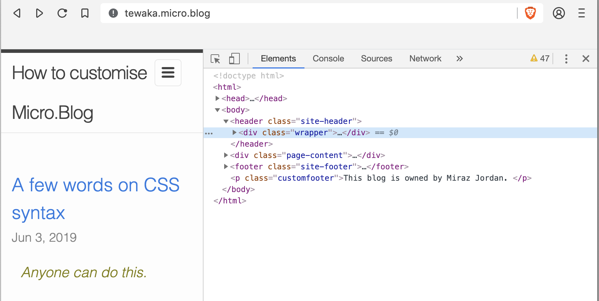
The Inspector opens in a new pane in the Brave browser. One line is highlighted but I must click the disclosure triangle at the left end of that line to see more.
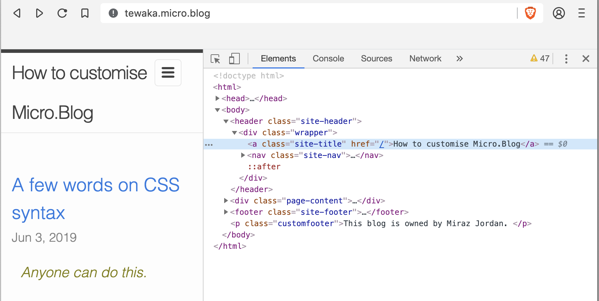
Site title link in the Inspector.

Read the CSS for an element in the Inspector.
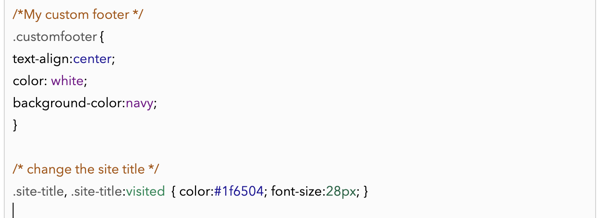
Corrected site title CSS rule.
Now my site title is displayed larger and in green.
Get help
If you want to customise your blog but can’t see what styles to change or why things aren’t working as expected, then ask on the Micro.Blog Slack Design Channel. People there are often very happy to help. Always include a link to your blog so they can take a look for themselves at what’s going on. Remember to give feedback too, such as letting helpers know that the change worked.