Link: Customizing Your Hosted Podcast Title and Artwork
Customizing Your Hosted Podcast Title and Artwork, by Chet.
There’s a small downside to having a podcast running on your main Micro.blog subscription. If you submit your podcast to Apple Podcasts (or anywhere else), Micro.blog by default defines your podcast title and artwork based on your blog. So your blog title is the podcast title, and your podcast artwork is your Micro.blog photo.
Manton plans to add the ability for everyone to change the podcast title and artwork in the Micro.blog dashboard at some point in the future. Until that feature is available, you can make the changes yourself if you’re using a custom theme.
Link: CSS for Photos page for Micro.blog-hosted blogs
I’ve added a new page for photos … We’re starting with a simple grid of photo thumbnails …, each linking to the microblog post. …
It uses CSS Grid Layout, so you can also customize a bunch of things without changing the template. For example, to change it to 5 equally-spaced columns, click Posts → Design → Edit CSS and paste in:
.photos-grid-container {
    grid-template-columns: 20% 20% 20% 20% 20% !important;
}
Source: Manton Reece - New photos page for Micro.blog-hosted blogs.
Link: Get Your Site Ready For Dark Mode
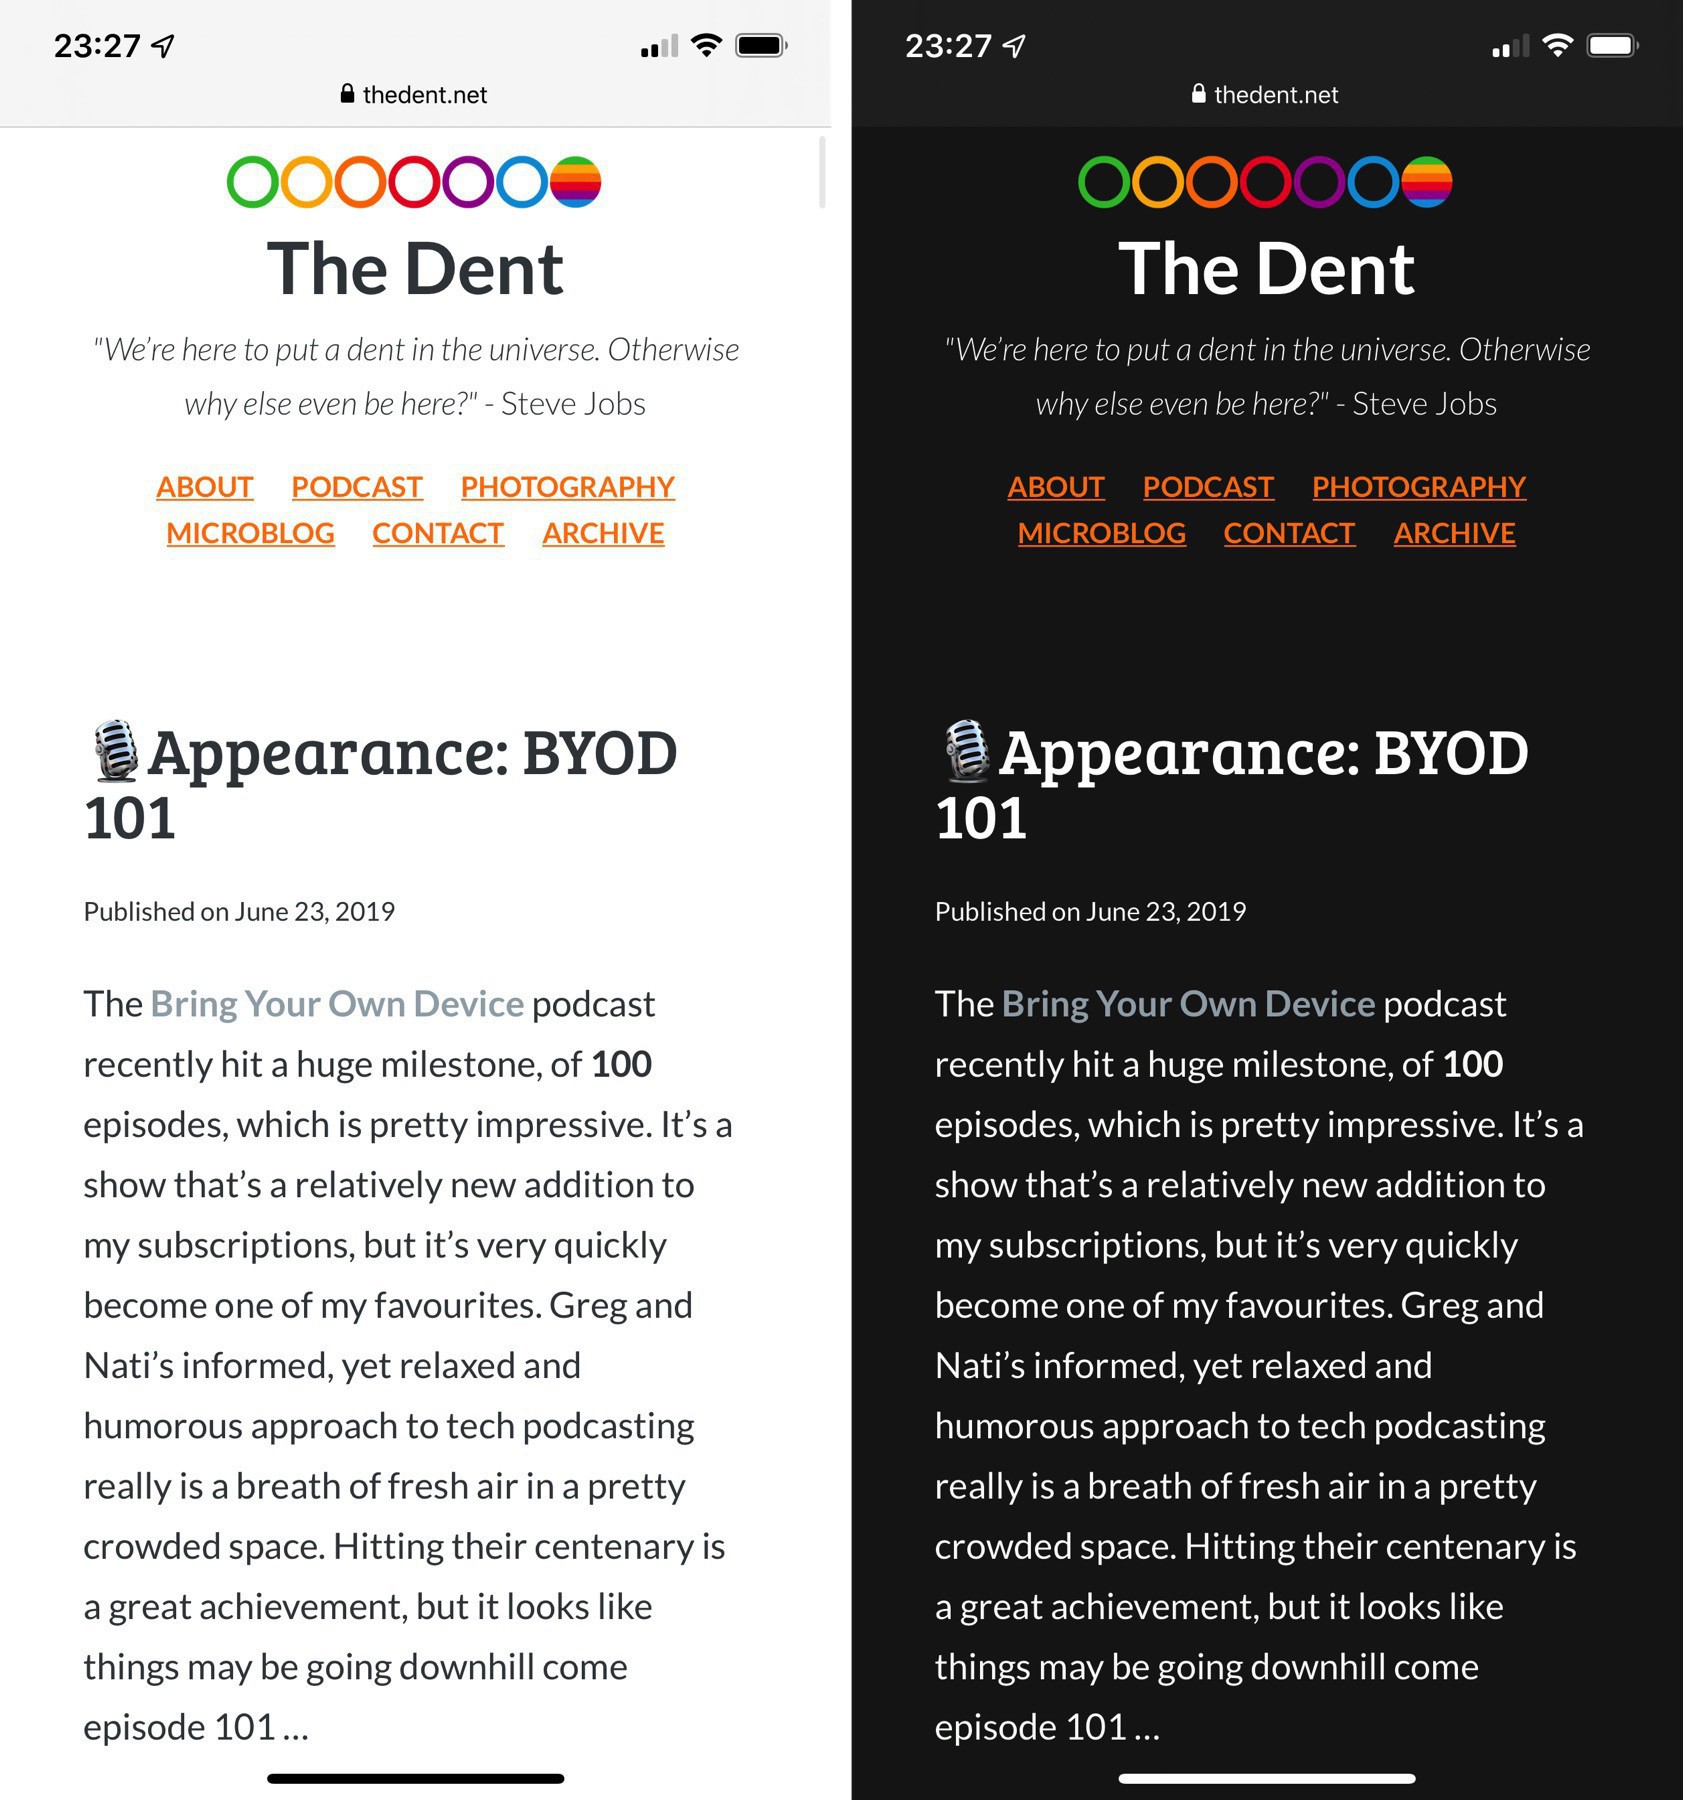
I’ve been able to update my site to support dark mode across iOS 13, iPadOS and MacOS.…It turns out to be extremely simple. I just had to add a small bit of code to my custom CSS, as seen below.
Thanks @andynicolaides .
Link: more structure to URLs
Manton wrote on July 6, 2019:
Rolled out a few tweaks to custom pages on Micro.blog-hosted blogs today, including performance improvements and allowing more structure to URLs, so you can create web pages like /travel/northwest or /books/fiction. (Click Posts → Pages and then edit a page. Enjoy!)
Add a header image to your blog
You can do this. You need to already know: how to reach your Theme files and the Custom CSS file. You also need to have prepared a suitable image.
I have a blog for folks interested in our local community — the beach where I live. As it’s a beautiful place I’d like to use a photo at the top of the pages. Many people would call this a header image, but for this tutorial I’ll refer to it as a banner, so as not to confuse it with the header part of the page that contains the title of the blog and other information. See Head, header, heading.
Caveat: I’ve only tested this with the Arabica theme my Love Waikawa Beach blog uses. Other themes may need slightly different instructions.
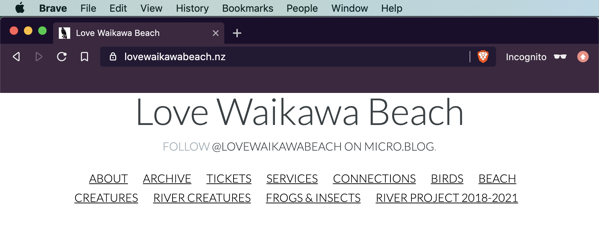
Love Waikawa Beach blog before the banner.
We’re going to add the banner image using an additional file, though it could also be added directly to the files that control the Home Page and other pages.
In addition, we need to edit one file and set up some CSS.
Step by step, copy and paste — it’s not too hard.
This is what we’ll do:
- Upload the prepared image, then copy and save the URL.
- Make a new theme page and paste in the code, then save.
- Paste some extra code into the page that lists posts, then save.
- Edit the Custom CSS to make it look better.
Upload the prepared image and copy the URL
- Prepare a suitable image. Mine was 929 pixels wide by 237 pixels high.
- Upload the image to your blog.
- Control click on the uploaded image and copy the image URL.
- Save that address somewhere as you’ll need it later.
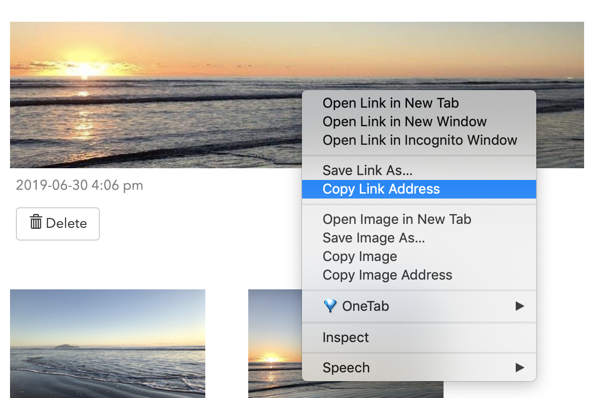
Copy the uploaded image address.
Make a new Theme page called layouts/partials/banner.html
- Go to the page that lists all your theme files.
- Click the New Template button. A new, empty, template page opens.
- In the empty name area at the top paste
layouts/partials/banner.html - In the main part of the page paste the code below. Replace the part that says
ImageURLwith the address for the image. - Click the Update Template button. The new template is saved and you’re returned to the list of templates.
The code to paste in the body of the new page. Replace the part that says ImageURL with the actual address for the image:
<div class=“banner”>
<img src=“ImageURL” alt=“” class=“banner” />
</div>

New Template button.
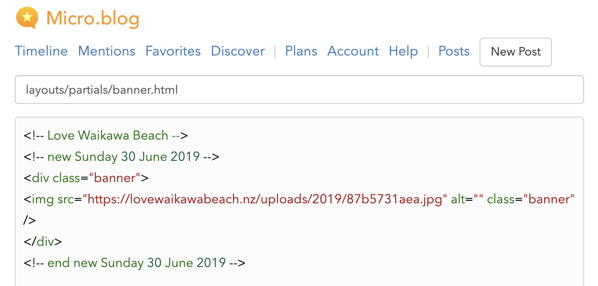
Love Waikawa Beach banner partial, with extra comments.
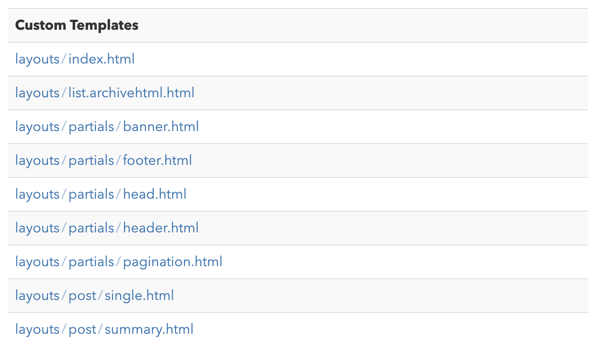
Love Waikawa Beach list of custom templates.
Paste additional code into layouts/partials/header.html
Note: In the Arabica theme you need layouts/partials/header.html. Other themes could name their header files differently or incorporate them into other files. In Arabica the header.html file is included in all other pages, so adding an item here will add it everywhere.
- Go to the page that lists all your theme files.
- Click the
layouts/partials/header.htmlpage to edit it. The page opens. - At the top, you should see something like:
<header class=“main-header”>. - Press Return after the end of that line to create a blank line.
- Paste in
{{ partial “banner.html” . }}(that’s all). - Click the Update Template button. The new template is saved and you’re returned to the list of templates.
That piece of code calls up the other page we just created and includes it in any page a visitor is viewing, if that page is based on the template we’ve added this code in to.
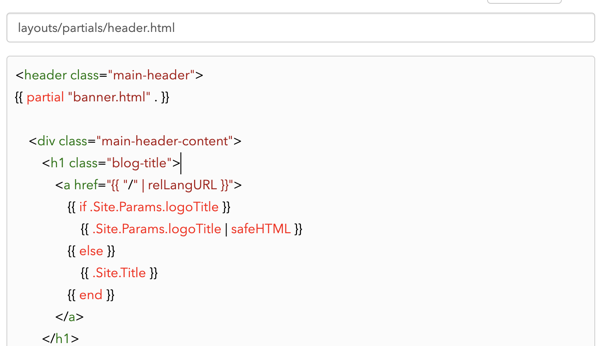
The banner code included in header.html.
There. You’ve now added the banner image to your Home Page. Visit your Home Page and refresh it to see the change. Try some other pages too. If the banner image doesn’t appear on other pages you’ll have to add the {{ partial “banner.html” . }} code to more of the theme files. Ask for help if you can’t work out where to add the code.
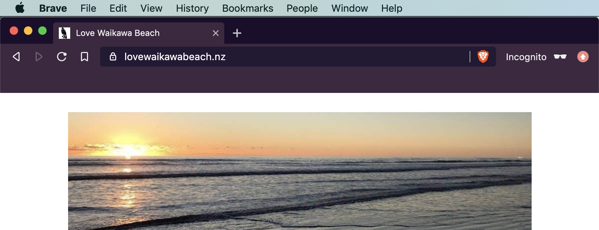
Love Waikawa Beach blog with banner, but notice the gap.
You may notice though that the banner image isn’t in exactly the right place. That’s where CSS comes in. I wanted to have my banner image butting right up against the top of the page.
Style the banner image
In the code above we assigned a class to the chunk of code that contains the banner: banner. We can use that to make sure the image is correctly placed. In my Custom CSS file I added this:
/* banner image */
.banner img {
  width:100%;
  max-width: 969px;
  padding-top:0;
  margin-top:0;
}

.main-header {
  padding-top:0;
  margin-top:0;
}
That set the banner image to be as wide as the rest of the page (100%) and it removed any padding or margin above the image. It then goes on to make sure the main-header that contains the banner image also has no padding or margin above it.
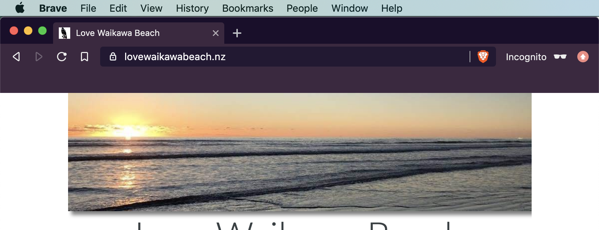
Love Waikawa Beach banner now buts up against the top of the page.
You may need or want different CSS coding for your blog’s banner image. Ask for help if you don’t know what you need.
Sometimes the hardest thing about all this is forcing your blog to refresh properly. While writing this tutorial I had to switch to a different browser with an Incognito window and refresh there for the changed CSS to be picked up.
Extra notes
One person found that when copying the code from this tutorial the speech marks all became curly (“ ”) instead of straight (" "). That didn’t happen for me, but watch for it causing problems for you.
The banner image of green characters at the top of this blog uses a different method. I did that before I’d figured out how to do it the way explained above. This one uses a background image, with the text below it shifted down a bit.
My personal blog uses the Marfa theme. I did an experiment that demonstrated my quick effort would need a lot more work. I added the layouts/partials/banner.html file as described above. Then I found I needed to edit layouts/_default/baseof.html rather than a header file. The results of that quick experiment were terrible and I removed the image again. As a proof of concept though, it worked.
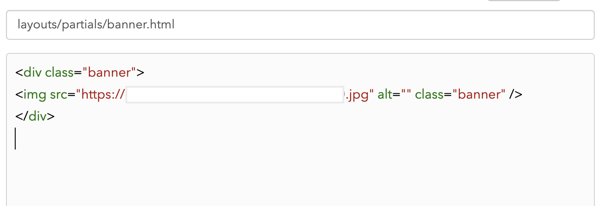
My blog banner coding.
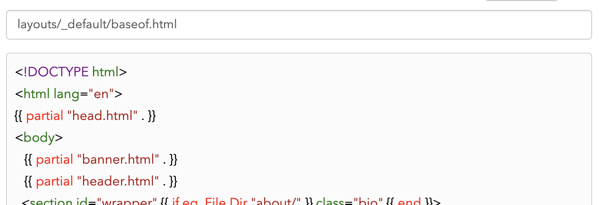
I edited baseof.html.
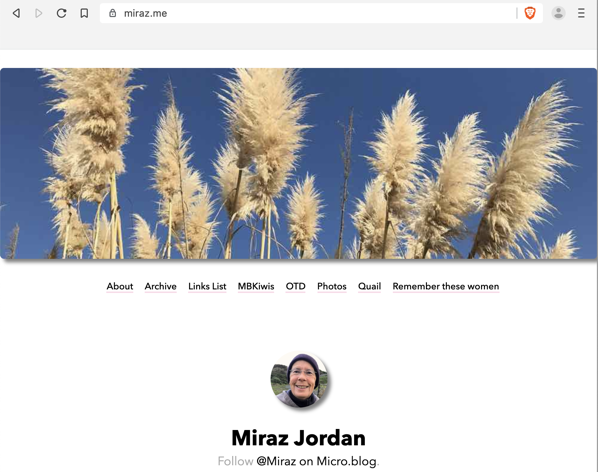
My blog banner is way too big and isn’t in keeping, but it did work.
Add number of available pages to the pagination
You can do this. You need to already know: how to reach your Theme files.
My Love Waikawa Beach website uses the Arabica theme. Along with providing links to older and newer posts (See Link to more blog pages with pagination) it tells you how many pages there are and which page you’re currently viewing.
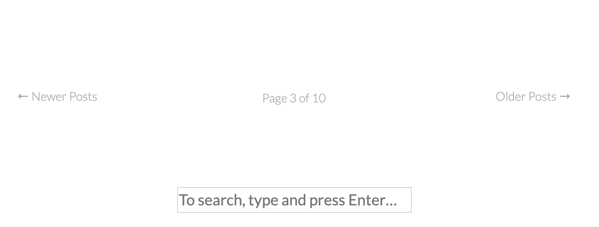
Page numbering - page 3 of 10.
I realised while making the screenshot what a pale grey those links are. That’s not very user-friendly and I’ll be making them darker and easier to read.
Here’s the end of the page on this blog after the pagination tutorial. Let’s add the number of pages between the links to Older and Newer Posts.
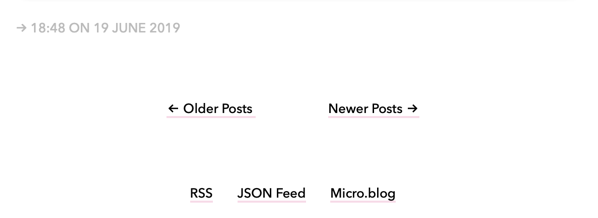
Pagination links separated mb
Add the page number code to layouts/partials/pagination.html
In the previous tutorial you created layouts/partials/pagination.html and pasted in the following code.
{{ $pag := $.Paginator }}

<nav id=“post-nav”>
     {{ if $pag.HasNext }}
        <span class=“older”>
            <a href=”{{ $pag.Next.URL }}” title=“Older Posts”>
                <span class=“arrow”>←</span> Older Posts
            </a>
        </span>
    {{ end }}
   {{ if $pag.HasPrev }}
        <span class=“newer”>
        <a href=”{{ $pag.Prev.URL }}” title=“Newer Posts”>
            Newer Posts <span class=“arrow”>→</span>
        </a>
        </span>
    {{ end }}
</nav>
Now we need to add extra code in the right place. The part to pay attention to is in the middle:
{{ end }}
   {{ if $pag.HasPrev }}
Copy the following code and paste it between {{ end }} and {{ if $pag.HasPrev }}.
The code to copy and paste (I’ve broken up the line to fit better on this blog):
<span class=“page-number”>
Page {{ $pag.PageNumber }} of {{ $pag.TotalPages }}
</span>
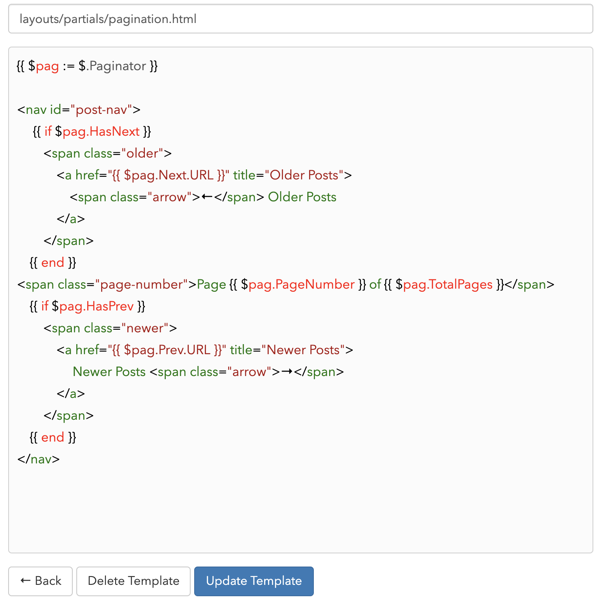
Page number code inserted between the Older and Newer posts links.
Click the Update Template button. The new template is saved and you’re returned to the list of templates.
You’ve now added page numbering to your Home Page. Visit your Home Page and refresh it to see the change.
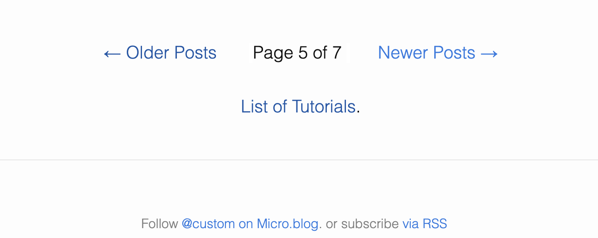
Page numbering on this Custom blog.
Link to more blog pages with pagination
You can do this. You need to already know: how to reach your Theme files and the Custom CSS file.
When visitors reach the bottom of the Home Page on my personal blog, there's nowhere to go. I'd like them to be able to see another page, of older posts, and then another, if they wish.
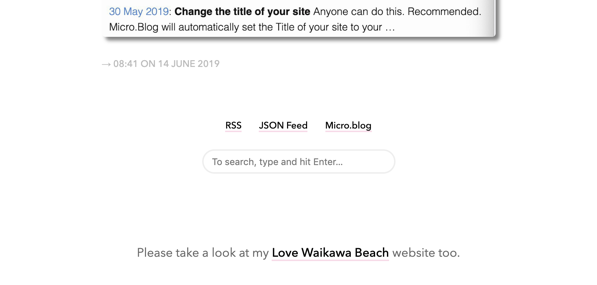
Bottom of the Home Page on my personal blog.
My personal blog uses the Marfa theme. Other themes do offer pagination controls. To add pagination is straightforward: copy the appropriate code, and paste it into the appropriate place, then tidy up the appearance with some CSS.
I found the pagination code in the Default theme. We're going to add the page numbers as that theme does, using an additional file, though they could also be added directly to the file that controls the Home Page.
In addition, we need to edit one file and set up some CSS.
Step by step, copy and paste — it's not too hard.
This is what we'll do:
- Make a new theme page and paste in the code, then save.
- Paste some extra code into the page that lists posts, then save.
- Edit the Custom CSS to make it look better.
Make a new Theme page called layouts/partials/pagination.html
- Go to the page that lists all your theme files.
- Click the New Template button. A new, empty, template page opens.
- In the empty name area at the top paste
layouts/partials/pagination.html - In the main part of the page paste the code below.
- Click the Update Template button. The new template is saved and you're returned to the list of templates.
The code to paste in the body of the new page:
{{ $pag := $.Paginator }}

<nav id="post-nav">
     {{ if $pag.HasNext }}
        <span class="older">
            <a href="{{ $pag.Next.URL }}" title="Older Posts">
                <span class="arrow">←</span> Older Posts
            </a>
        </span>
    {{ end }}
   {{ if $pag.HasPrev }}
        <span class="newer">
            <a href="{{ $pag.Prev.URL }}" title="Newer Posts">
                 Newer Posts <span class="arrow">→</span>
            </a>
        </span>
    {{ end }}
</nav>

New Template button.

Page name.
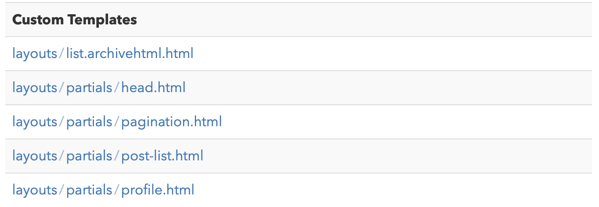
List of custom templates.
The code above links to older posts on the left and newer posts on the right. I've edited it to do that: the original linked to newer on the left and older on the right.
Paste additional code into layouts/partials/post-list.html
Note: In the Arabica theme you need layouts/_default/list.html. Other themes could name their Home Page files differently.
- Go to the page that lists all your theme files.
- Click the
layouts/partials/post-list.htmlpage to edit it. The page opens. - Scroll to the bottom. You should see something like:
{{ end }} </ul>. There’s nothing after that. That’s the code that appears in theMarfatheme, but your theme may be different. - Paste the code below.
- Click the Update Template button. The new template is saved and you’re returned to the list of templates.
The code to paste in:
<div class=“extra-pagination”>
        {{ partial “pagination.html” .}}
</div>
That piece of code calls up the other page we just created and includes it in any page a visitor is viewing, if that page is based on the template we’ve added this code in to.
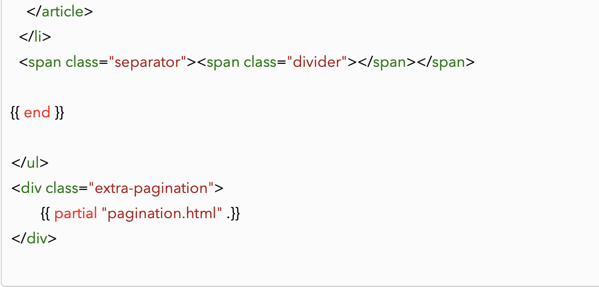
Partial included in Home Page template.
There. You’ve now added pagination to your Home Page. Visit your Home Page and refresh it to see the change. Scroll to the bottom then try out the Older Posts
and then Newer Posts
links.
You may notice though that both links appear right next to one another and it all looks a bit cramped. That’s where CSS comes in.
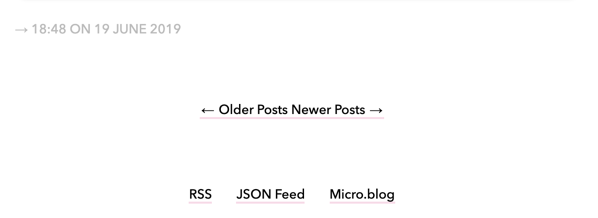
Our new pagination links are all jammed up together.
Style the pagination links to be centred across the page
In the code above we assigned a class to the chunk of code that contains the links: extra-pagination. We can use that to make sure the links are centred across the page. In your Custom CSS file add this:
/* Centre the pagination links /
.extra-pagination { text-align: center; }
Style the pagination links to move them apart
The two links also each had a class: older and newer.
One way to separate them is to add padding on the right or left.
In your Custom CSS file add this:
/ pad out the older and newer pagination links */
span.older { padding-right:2rem; border-right: solid #ffffff 4px; }
span.newer { padding-left:2rem; border-left: solid #ffffff 4px; }
What that does is to add a white (#ffffff) border that’s 4 pixels wide on one side. If your page background is white then that border will be invisible.
It also adds some padding to push the links apart.
You could change the colour, change the 4px border width, or change the 2rem padding to suit yourself.
Save the Custom CSS file and then check your blog.
Sometimes the hardest thing about all this is forcing your blog to refresh properly. While writing this tutorial I had to switch to a different browser and refresh there for the changed CSS to be picked up.
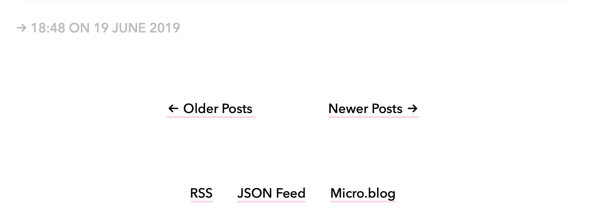
The Pagination links have been separated by CSS.
Link: Referencing photos in Hugo themes
Manton Reece: Referencing photos in Hugo themes, June 26, 2019.
This post provides the code you need to add metadata to the head of a blog post based on the images it contains:
This looks at the photos on a post and takes the first one, adding its URL to a meta tag. If instead of the original photo you want to include a smaller thumbnail, you can use Micro.blog’s special photos.micro.blog resizing proxy.
Link: Micro.blog Map
David Hall: Micro.blog Map.
I have adapted my method of linking articles to and from a map here within a subscription Micro.blog's pages that again uses Leaflet and tiles from Open Street Map/Mapbox.
The post contains detailed instructions on how to edit theme templates to link a post to a location on a map.
Add a search to your blog
You can do this.
I noticed my personal blog, which uses the Marfa theme, has a search box at the bottom of the page, in the footer. This blog, based on the Default theme and which could really use a search function didn't have one. I took the relevant code from Marfa, edited it slightly, wrapped it in a bit of extra HTML and then added some custom CSS.
I suggest visiting Add a favicon before working through this tutorial as it explains about making a new theme or editing a custom theme.
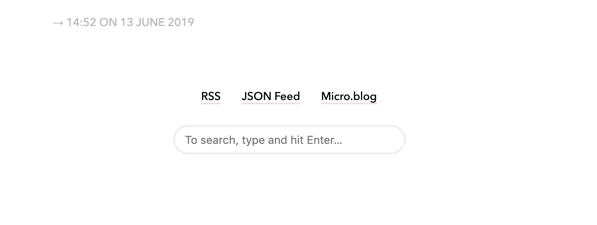
Search box on Marfa themed blog.
I explain how to add the code to the footer, but you might prefer to add it at another point, such as near the navigation links or above the main body of your pages.
Edit the theme footer
- Open
layouts/partials/footer.htmlfor editing. - Decide where in the footer you wish to add the search. Be careful to put it after some other element and not in the middle.
- Copy the code below and paste it in to the footer file. Note: I've broken a couple of lines so it fits better on this page. That shouldn't make any difference.
- Save and refresh your blog to check that it's showing up as you expected. Note: until we add some custom CSS coding it may not look quite right.
<section class="search">
 <form method="get" id="search" action="[duckduckgo.com](https://duckduckgo.com/)">
    <input type="hidden" name="sites" value="{{ "/" | absURL }}"/>
    <input type="hidden" name="k8" value="#444444"/>
    <input type="hidden" name="k9" value="#ee4792"/>
    <input type="hidden" name="kt" value="h"/>
    <input class="field" type="text" name="q" maxlength="255"
placeholder="To search, type and hit Enter…"/>
    <input type="submit" value="Search" style="display: none;" />
  </form>
</section>
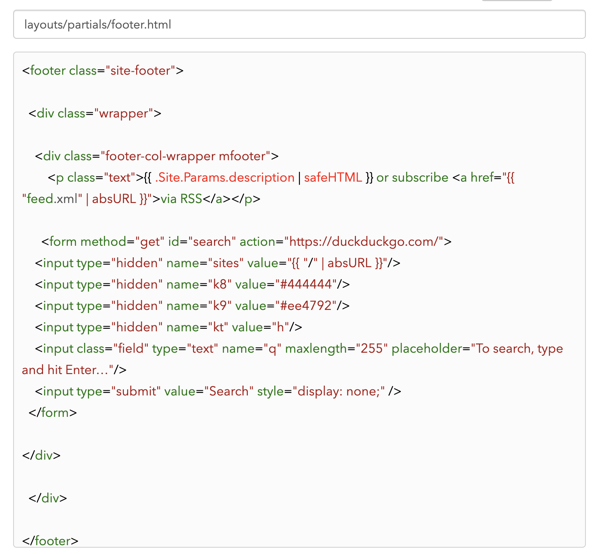
Part of the Search code added to this blog. It's missing the opening and closing section tags and class.

Search on this site before CSS. It's cramped, easily overlooked and the instructional text doesn't fit into the search box. I also dislike the word 'hit' to edited that in the footer file.
Edit the Custom CSS
Now go to your Custom CSS file and add the following. Of course, you may choose to change things to better match your blog.
/* custom search box */
.search input.field {
margin: 2rem 0;
line-height: 1.4rem;
font-size: 1rem;
width:15rem;
}
Some explanations:
- the
marginadds some space above and below but not on either side. - the line-height and width make the search box a bit bigger, which helps all the hint text be visible.
- I find the default font size too tiny so have enlarged it.

Search on this blog after CSS.
Test the search
Things became slightly tricky here. I tested the search on this blog, however no results were found, even though they should have been. It occurred to me that this blog at time of writing is very new and perhaps the search engine hasn't indexed it yet.
I tested the search on my Love Waikawa Beach blog, now several months old, and plenty of useful results were returned.
How to add or remove a copyright or year in the footer
You can do this.
My Love Waikawa Beach blog uses the Arabica theme which includes a copyright line in the footer. I don’t want the copyright and decided to edit that line. It also includes a date which I wanted to move.
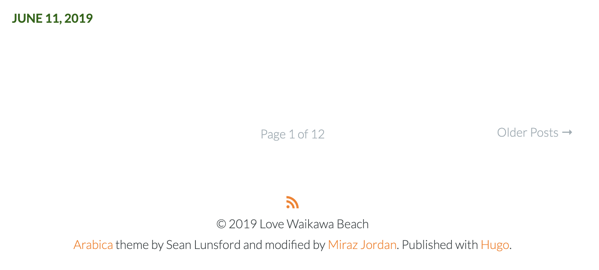
Copyright line on the Love Waikawa Beach blog.
Delete a copyright symbol
- Go to the theme file
layouts/partials/footer.html. - Look for the line which shows the
©symbol. - Carefully delete the
©symbol. Make sure not to edit anything else. - Save the file and refresh your blog to check the change.
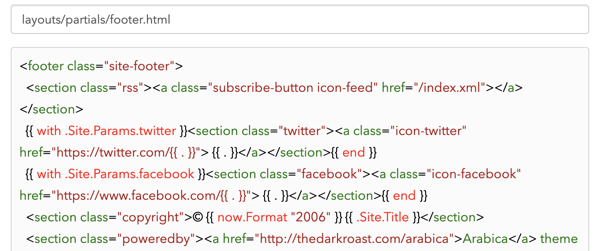
Edit copyright line in the theme.
To add a © symbol
You will likely want to add both text and the © symbol. On the Arabica theme the footer generates the name of the site and the current year from code, using the following line. Note: I’ve broken up the lines to work better on this blog.
 <section class=“copyright”>
{{ .Site.Title }}
{{ now.Format “2006” }}
</section>
Copy the code above and paste it into layouts/partials/footer.html where you want it to appear.
Add the © symbol, if you wish.
Note: you can put the three items in any order that suits you, but remember to include spaces before the opening or after the closing curly braces to separate the items.
“2006” is a special date. It tells the system to include the current date in that format, so don’t change it to a different year. See Change the date format for more information about dates.
Remember to save the file and check your blog.
Now go to your Custom CSS and style the copyright line to suit yourself. You might want something along these lines:
.copyright {
text-align:center;
font-weight:bold;
}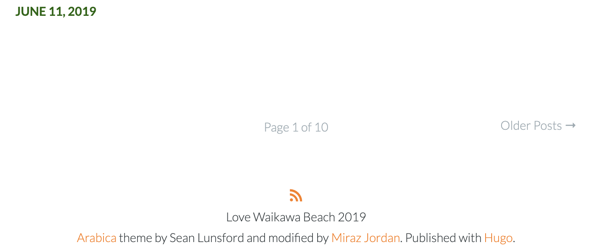
Copyright gone and date moved.
Link: How to Hide Categories on Micro.blog Arabica Theme
Rocket Panda explains How to Hide Categories on Micro.blog Arabica Theme.
After some digging and help from people at the Hugo discourse and the micro.blog Slack I managed to get it to work properly, with a very easy fix. …
You will also see that there is a number 5 at the end of that line of code, which means to show only 5 posts per page. … Again, you can remove this if you want, or change the number of posts to whatever you want.
Link: Adding pagination to the Hyde theme
Adding pagination to the Hyde theme (Micro.blog)
Posted on: 2019-04-09
I finally sat down and took a look at Hugo themes last night to add pagination to the Micro.blog-hosted Hyde theme. Turns out, it was much easier than I expected!
Source: Adding pagination to the Hyde theme (Micro.blog) :: End on End.
Once I actually correctly followed the instructions, this worked perfectly for the Default theme. Many thanks Jason.
How to force a refresh
Anyone can do this.
Most of these tutorials tell you to refresh a web page to see and check any changes you’ve made. But there’s an unpleasant foible that hasn’t been mentioned yet: sometimes the darned web page just won’t seem to refresh! It holds on to the old copy of the information and just isn’t going to give it up.
That’s happened to me often in the course of writing these tutorials, and in fact, all throughout the years I’ve been using web browsers.
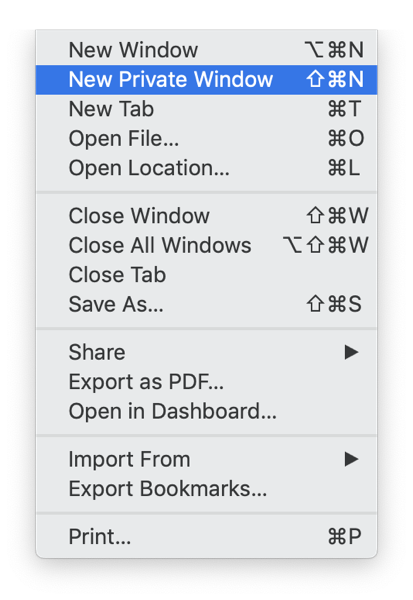
New Private Window in Safari.
Refreshing tips
- Try refreshing a few more times. It might work.
- Try putting a
?at the end of the URL and then press theReturnorEnterkey. - Try a Private or Incognito Window (see the File menu).
- Try a different web browser. I keep a couple of browsers that I don’t use for anything much else so they seldom have stored or
cachedweb pages. - Try emptying the cache and restarting the browser. (Beware: if you save passwords or logons or other things this could delete them.)
- Try a different device: phone instead of computer, iPad instead of phone.
- On a Mac? Hold down the
OptionorShiftkey while looking at whichever Menu has theReloadorRefreshitem. You may find it offers a slightly different possibility such asReload Page From Origin
(Safari).
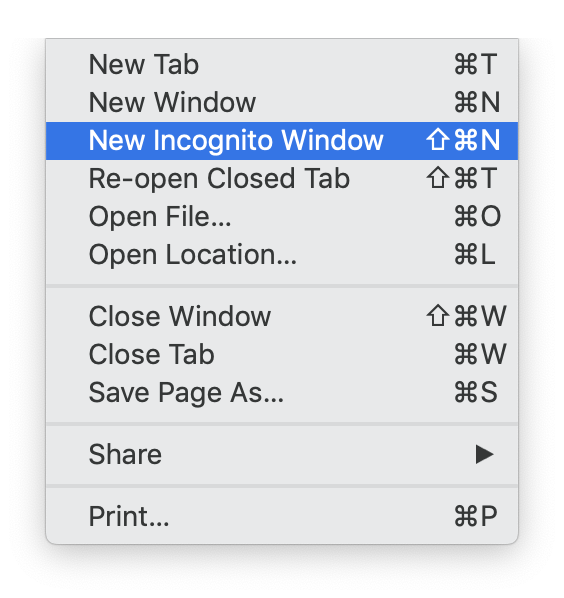
New Incognito Window in Brave.
Use Comments and the Web Inspector
Maybe the page has refreshed but your changes didn’t work. Depending on what you’ve changed you could add an HTML Comment then save again, Refresh, then use the Web Inspector. Can you see that Comment? If so, then your changes haven’t worked if you can’t see them. If you added a Comment but can’t see it in the Web Inspector then the page hasn’t properly refreshed (or you forgot to save your changes).
See: HTML and CSS comments are extremely useful and Let’s investigate a web page.
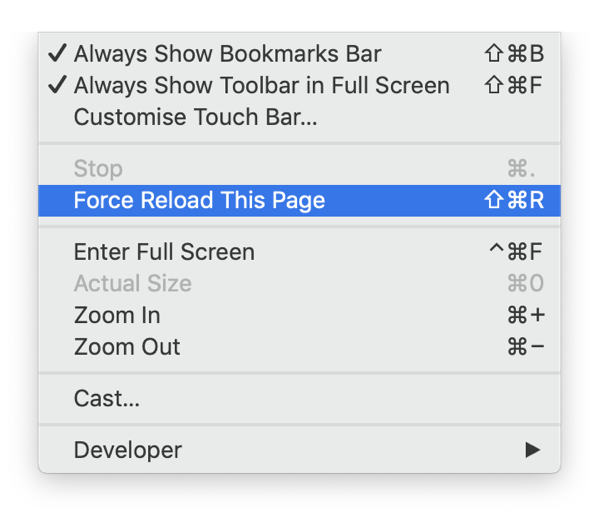
Force Reload This Page in Brave.
Display oldest items first in the Archive
Anyone can do this.
On a blog the Home Page will usually show the latest post at the top of the page and work backwards from there.
The Archive page does the same thing.
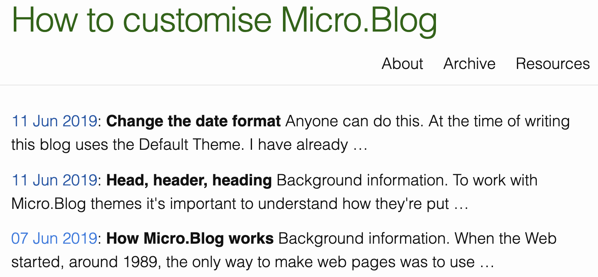
Archive page displaying newest posts first.
On this tutorials blog the oldest posts were about things to know first, and the easiest things to customise. The rest of the tutorials have followed in a fairly logical order (I hope). That makes it advantageous to display the oldest posts first on the Archive page.
You might want to do something similar, if that’s what’s best for your blog. It’s a matter of adding .Reverse in the right spot in one template: layouts/list.archivehtml.html.
I suggest visiting Add a favicon before working through this tutorial as it explains about making a new theme or editing a custom theme.
- Go to the Design section of your blog and scroll down to the Custom theme: area.
- Click on Edit Custom Themes. You’re taken to a new page which lists all the custom themes you have. Click on the name of the theme you want to edit. The Theme Templates page is loaded.
- The Theme Templates page lists all the files that lie behind your blog. Look for the template called
layouts/list.archivehtml.htmland click that template to edit it. You’re taken to a template editing page. - On the template editing page look for a line about halfway down which says:
{{ $list := (where .Site.Pages “Type” “post”) }}. Carefully replace this part:.Site.Pageswith.Site.Pages.Reverse. Be careful to keep all punctuation and other coding intact. - Click the Update Template button to save your changes. Your changes are saved and you’re returned to the Theme Templates page.
- Visit the
Archivepage of your blog and refresh to check what you’ve done and that your blog is still working as expected.
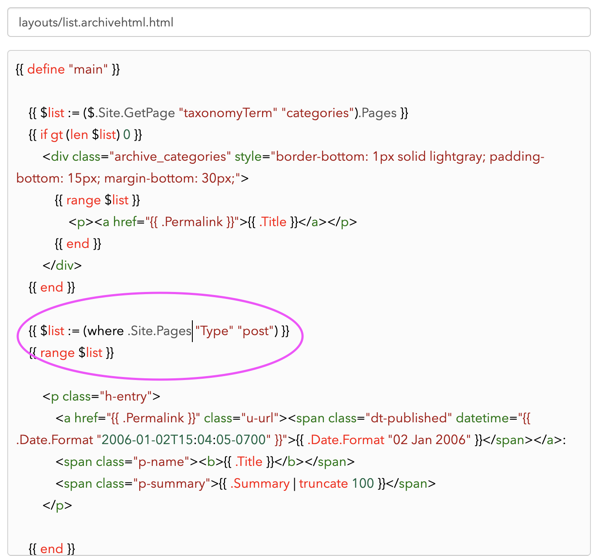
Coding to sort with newest first.
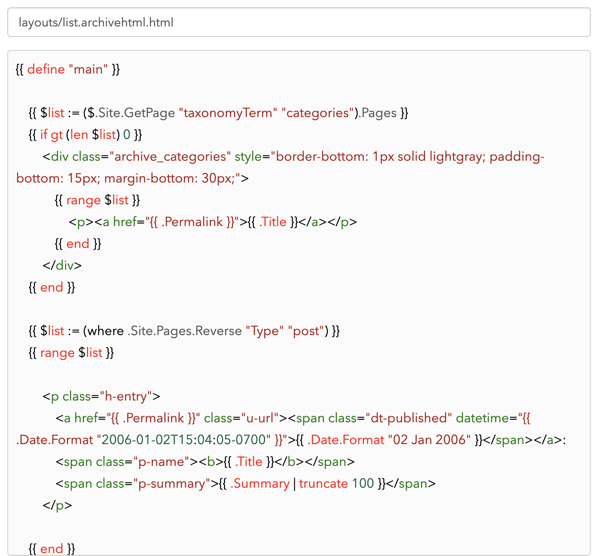
Coding to sort with oldest first.
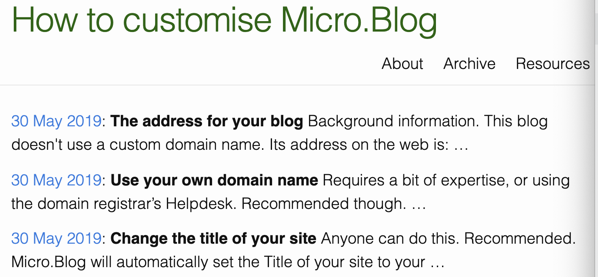
The Archive page now shows oldest posts first.
Change how many blog posts display on the Home Page
Anyone can do this.
Themes might differ in how many posts they display on the Home Page or in the Archive. If you tend to write long posts perhaps you’d like fewer posts per page. Or if you have a lot of very short posts, perhaps you’d like more. It’s easy to change it to suit yourself.
I suggest visiting Add a favicon before working through this tutorial as it has information about editing existing custom themes or creating a new custom theme.
- Edit your
Custom Theme, or make a New Theme. - Click on
layouts/_default/list.htmlto edit it. - Look for the following line of code. Note, I’ve broken the lines up so it displays better here:
{{ $paginator := .Paginate (where .Data.Pages.ByDate.Reverse “Type” “post”) (index .Site.Params “archive-paginate” | default 25) }} - Change the
25to the number you prefer. Be sure not to change anything else. - Click the Update Template button to save your changes.
- Now go to the Home Page of your blog and refresh. Check that nothing has broken and also that your change has taken effect.
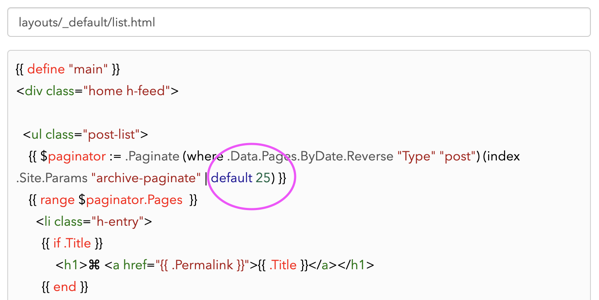
Change the number of posts on the Home Page.
Change the date format
Anyone can do this.
At the time of writing this blog uses the Default Theme. I have already customised it a little, by adding a strip of graphics across the top, and a few other small touches.
In the first screenshot below you can see the upper part of the Home Page. Note that the Title of the first item is preceded by a ⌘ and the title itself is a link. Below that is a date: Jun 11, 2019.
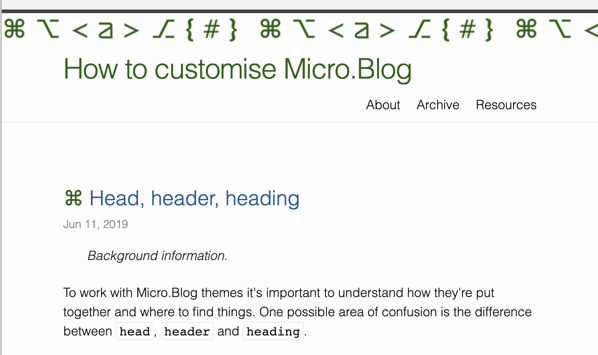
Top of the Home Page.
The second screenshot shows a single page — I clicked the link of the post title on the Home Page and am now viewing just the single post. Note that the Title of the post is no longer preceded by a ⌘ and the title itself is no longer a link. We still have the date: Jun 11, 2019.
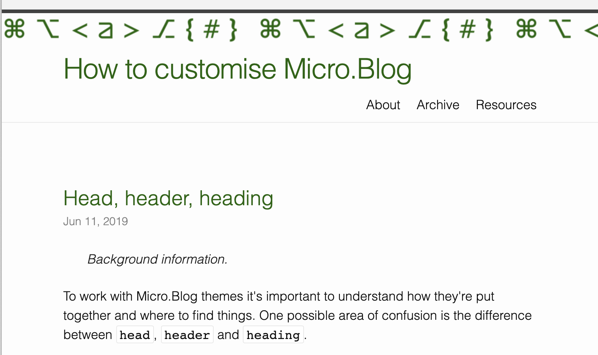
Top of a Single Post page.
In today's tutorial we'll look at how to change the format of that date. I prefer something like 11 June 2019
, but you may prefer some other different format.
We'll need to make the change — it's an easy one — in two places.
Edit the Theme files
I suggest visiting Add a favicon before working through this tutorial about dates.
To edit the Theme files:
- Click on the Posts link at the top of the behind-the-scenes area of your blog. You're taken to the page of your recent posts, and a set of navigation buttons is shown above your posts.
- Click on the Design button above the list of your posts. You're taken to the Design area of your blog.
- Scroll down past the available Themes and click on the Edit Custom Themes button. You're taken to a page where you can create a
New Themeor edit an existing Custom Theme. See also the instructions at Add a favicon. - Either create a new theme or click the name of an existing theme to edit it. In this tutorial I'll edit my
favicontheme. You're taken to a page that listsDefault Templatesat the bottom, templates for your selected theme above that and at the top any custom templates you have already created. In my case, theTemplates for Defaultrefers to templates for the theme namedDefaultthat I've selected for my blog. - Where you go next depends slightly on any custom templates you may have already created. Read on.
If you have already created a custom version of the theme file you need then edit that. Otherwise, select the theme file you need from the list of files available for your theme.
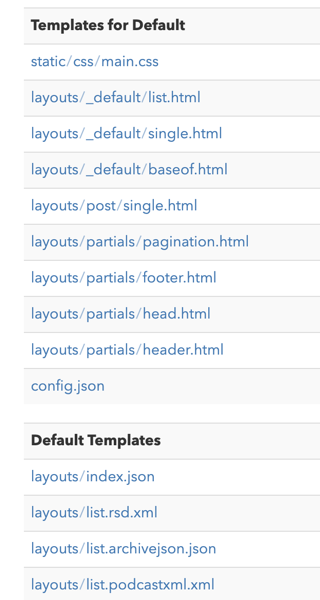
List of templates in Micro.Blog. The default Micro.Blog templates are at the bottom. Above that are templates for my selected theme which is called Default.
Edit the theme template for the Home Page
First we'll change the date format on the Home Page. Different themes might use different templates for things, but the Default Theme uses layouts/_default/list.html to determine how the Home Page will be presented.
Click on layouts/_default/list.html to open it for editing.
If this is the first time you've edited this file Micro.Blog creates a copy and adds it to the list of your Custom Templates. It also opens it for editing.
If you have already created that particular Custom template then click on it in the list to open it for further editing.
One of the things about Hugo, the system that Micro.Blog is based on, is that the templates are very readable, using words that are taken from the English language.
Look through the template until you come to a section like this. Note that I've broken up some of the lines to fit on this page.
<time class="dt-published"
datetime="{{ .Date.Format "2006-01-02 15:04:05 -0700" }}"
>{{ .Date.Format "Jan 2, 2006" }}</time>
Pay particular attention to this part: .Date.Format "Jan 2, 2006", especially Jan 2, 2006 . That's the part you need to carefully edit.
Make sure when you edit templates to only change the small part you need to change. If you accidentally obliterate a speechmark " or other punctuation for example, your blog may stop working correctly.
In my case, I prefer the 02 January 2006 format to Jan 2, 2006.
Being very careful to only replace the exact part, I insert my new format.
Note: you're not putting in today's date, you're just reordering the date that's already there.
Click the Update Template button to save your changes.
Now go to the Home Page of your blog and refresh. Check that nothing has broken and also that your change has taken effect.
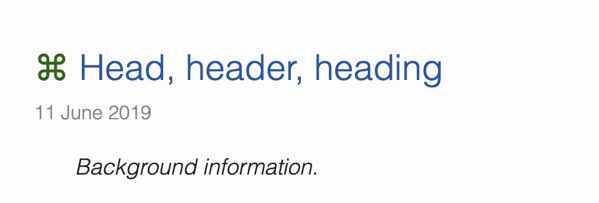
My new Home Page date format.
There are reference document for Hugo. Hugo Date and Time Templating Reference explains the possible way to format a date.
If all has gone well then the date format on the Home Page now reflects your choice. However, open your blog post into its own page or visit the Archives page and you'll see they don't reflect the change.
Edit the theme template for the single blog post page
Click to edit layouts/post/single.html. Note: don't confuse this with the similarly named layouts/_default/single.html. You need the one with post in its name.
Follow the steps above to change the date format and remember to save the edited template.
Now go to the page for one single blog post and refresh. Check that nothing has broken and also that your change has taken effect.
Edit the theme template for the Archive page
On this blog the Archive page used an entirely different date format: 2019-06-11.
This format is particularly confusing. In the US it would be read as 11 June, while in some other parts of the world, such as the UK and New Zealand it will be read as 06 November. Other countries may interpret it some other way.
Click to edit layouts/list.archivehtml.html. Note: this is at the bottom of the templates list page in the Default Templates section.
Follow the steps above to change the date format and remember to save the edited template.
Now go to the page for the Archive page and refresh. Check that nothing has broken and also that your change has taken effect.

Archive page original date format.

Archive page clearer date format.
Link: Parameters in themes
Micro.blog Help has instructions for working with Parameters in themes:
Parameters in themes
Custom params in Hugo.
Custom themes sometimes need to set extra parameters to be used in templates. You can set custom parameters as well as override some of Hugo’s default configuration by creating a config.json file in your theme.
Read the instructions: Parameters in themes Custom params in Hugo. Published April 29, 2019.
Link: Truncated posts on your microblog
Micro.blog Help has instructions for working with Truncated posts on your microblog:
Truncated posts on your microblog
Customizing a theme.
If you write a lot of longer posts, you may want to only include the first part of those posts on your microblog’s home page. By default, Micro.blog will include the full text of each post on your home page. You can use custom themes to customize this.
Read the instructions: Truncated posts on your microblog Customizing a theme. Published April 26, 2019.
Link: Custom themes
Micro.blog Help has instructions for working with Custom themes:
Custom themes
Creating or copying custom themes.
Custom themes contain HTML and CSS templates using the Hugo blogging engine. Creating a new template in a custom theme will override a template with the same name in the built-in design you’ve chosen for your blog.
Read the instructions: Custom themes Creating or copying custom themes. Published January 30, 2019.
Link: Custom CSS
Micro.blog Help has instructions for working with Custom CSS:
Custom CSS
Customizing your hosted microblog with CSS.
You can pick from several default themes for your Micro.blog-hosted site. You can also add CSS to further customize the design of your site.
Read the instructions: Custom CSS Customizing your hosted microblog with CSS (link updated 01 June 2022). Published August 19, 2017.
Link: Set up a Custom Domain
Micro.blog Help has instructions for setting up Custom domains:
Custom domains
Point your custom domain to Micro.blog.
If you host your microblog with a paid Micro.blog plan, consider pointing a custom domain to it. This could be something like microblog.yourdomain.com or even just yourdomain.com. Mapping a custom domain to Micro.blog is included free, as long as you already have your domain registered.
Read the instructions: Custom domains Point your custom domain to Micro.blog. Published December 8, 2015.
Link: Make a custom home page
Micro.blog Help has instructions for making a Custom home page:
Custom home page
Setting static text for your home page.
By default, Micro.blog shows the most recent posts on your blog’s home page. You can override this by creating a custom theme with a different home page layout that includes any text.
Read the instructions: Custom home page Setting static text for your home page. Published May 15, 2019.
Link: Changing the default colors of the Micro.blog Marfa theme
Roel Willems: Micro Guide: Changing the default colors of the Micro.blog Marfa theme.
Micro Guide: Changing the default colors of the Micro.blog Marfa theme
APR 15, 2018I switched my theme for this microblog to Marfa.
Marfa is a new theme for Micro.blog hosted websites. I really like the theme but wanted to give it a small personal touch by changing the default color for links.
Head, header, heading
Background information.
To work with Micro.Blog themes it's important to understand how they're put together and where to find things. One possible area of confusion is the difference between head, header and heading.
The head of a web page contains metadata
Every web page has two parts: a head and a body.
The body holds everything that is made readily visible to the public — it's where all the text, pictures, videos and whatnot live.
The head holds information that is mostly for the browser to use. It may contain links to stylesheets, for example, or information about which character set to use. Although a person could make a small effort and view that stuff it's not intended for humans, but for software.
One thing the head does contain is the title for the whole website. The title is commonly displayed in the browser tab or used if someone bookmarks the page.
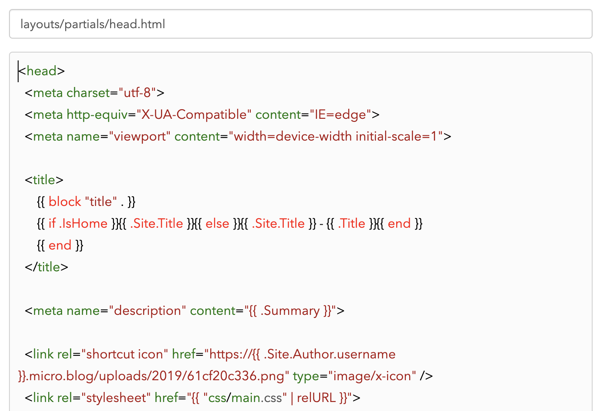
Part of the Head of the Default Theme.
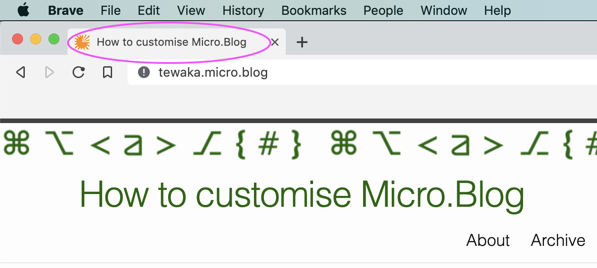
The title of the website is visible in the browser tab.
By and large most people customising their blog won't need to edit the head.
One exception to that is if you want to add a favicon, also known as a shortcut icon. In the screenshot above of the title in a browser tab, notice the orange blob to the left of the word How
which is the custom favicon for this site at the time of writing.
The header is at the top of a web page
The header is an area of interest for many. It's the part at the top of a visible web page. It generally contains the name of the blog, maybe some navigation links, maybe other things.
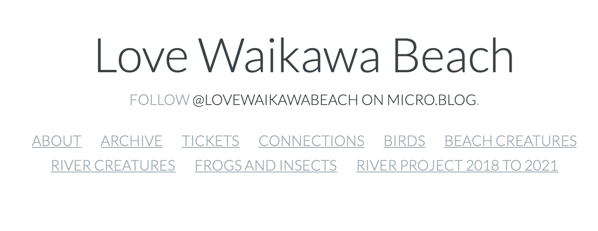
Header of my Love Waikawa Beach blog.
A heading summarises the paragraphs below
A heading could be the title of an individual blog post or in a longer blog post, such as this one, it could be a heading for a subsection.
It's a good idea, if you use headings in longer blog posts, to think of them as headlines, like you'd see in a newspaper. Use them to tell the story, with the paragraphs below amplifying and adding detail.
If you want to change how headings look, perhaps making them a different colour or a different size, you'd do that through CSS.
Headings come in levels. An h1 is the most important, while an h6 is the least important. Commonly the name of the blog will be an h1, while the title for an individual blog post will be an h2, but it may depend on the theme.